Editing your Hosts file on MAC
Viewing your website via the hosts file on your browser is the best way to test a website before it goes live. It bypasses the DNS, meaning that you can see an exact copy of a website as it is on your server, whilst everyone else sees the live version. It also helps to avoid the effects of propagation and caching which can cause all sorts of confusion when working on a website.
Option 1 (Recommended): Editing the hosts file using an editor such as iHosts
The most straightforward way of editing your hosts file on a Mac is by using an editor called 'iHosts' which you can download here for free from the Mac App Store.
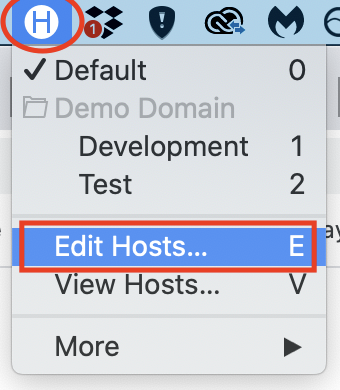
1. Once you have iHosts setup, you will see the iHost's icon in the system menu bar (top righthand corner of the screen). Click on this and select 'Edit Hosts...' from the dropdown menu or 'CMD + E' keys to open via the shortcut:
2. In the 'Edit Hosts...' window you will see the contents of your computer's hosts file. Below the localhost settings enter the IP address of your server followed by the domain name. Make sure that you enter a duplicate entry below this with the www. domain name just incase of redirects.
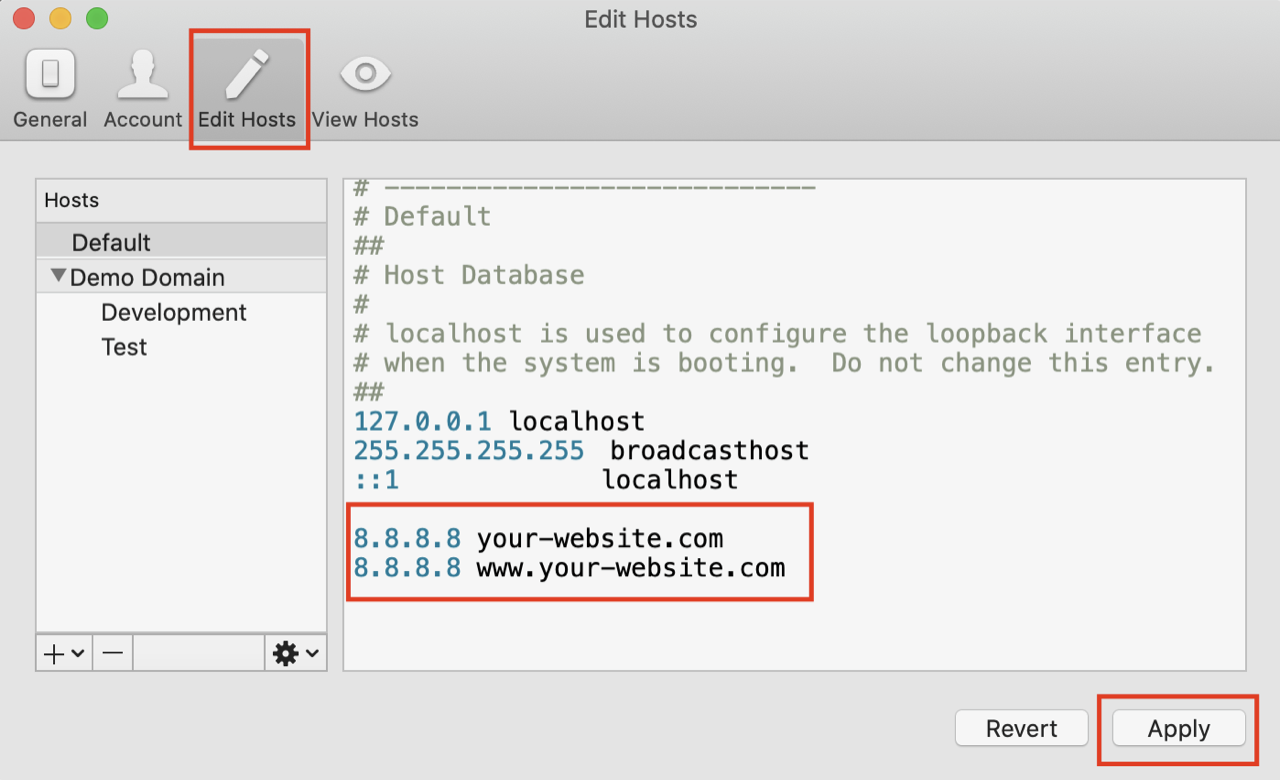
3. Click the 'Apply' button to save your changes, then open up your browser and navigate to the website. Its always best to clear your browser cache and open up a guest window to avoid viewing any previous versions that your browser may have cached.
In Chrome to view in a fresh cache it is best to view as a Guest by going to the following:
- At the top right, click Profile.
- Click Guest.
If you would like to check that you have setup your hosts file entry correctly please read 'Check that you have set your hosts file up correctly' at the bottom of this page.
Option 2: Editing the hosts file directly
If you would prefer to edit the hosts file directly on you Mac without using an editor such as iHosts, you can achieve this by following the steps below.
Open Terminal from Applications>Utilities>Terminal.
Open the hosts file in Terminal by entering:
sudo nano /private/etc/hosts(you may need to remove the '$' if terminal reports "-bash: $: command not found").
Enter your Mac password if you have one.
Use the arrow keys to navigate to the bottom of the list, and enter the IP Address of your server, hit the tab button, then input the url of your website.

When finished, hit Control+O followed by ENTER/RETURN to save changes
Now you can test your sites as if they were live. You may need to clear your browser cache and then browse to the domain.
Note: To go back to using the public DNS you need to revert the changes made to your local host file. To do this, do the exact same steps above, but remove the new entries you made, then save as detailed in step 5. You may need to clear your browser cache once again not ensure everything is fresh.
NB: If you entered www.example.com in your host file, you'll need to browse to www.example.com.
Example.com would still show the current live site unless you also place this in the hosts file.
Check that you have set your hosts file up correctly
To check that you have setup your hosts file correctly via either of the options above simply ping the website and check that the IP address matches what you have in your hosts file.
To do this open 'Terminal' and type: 'ping your-website.com'. Terminal should return with the IP address that you have in your hosts. To stop pinging simply press ' CTRL + C ' keys.
Updated about 1 year ago