Setting up iOS, iPhone, iPad
Setting up your iOS device following this guide:
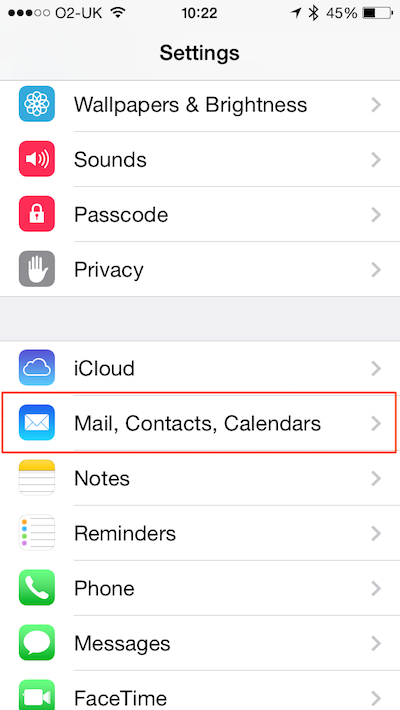
1. Go into the settings section and click on Mail, Contacts, Calendars.
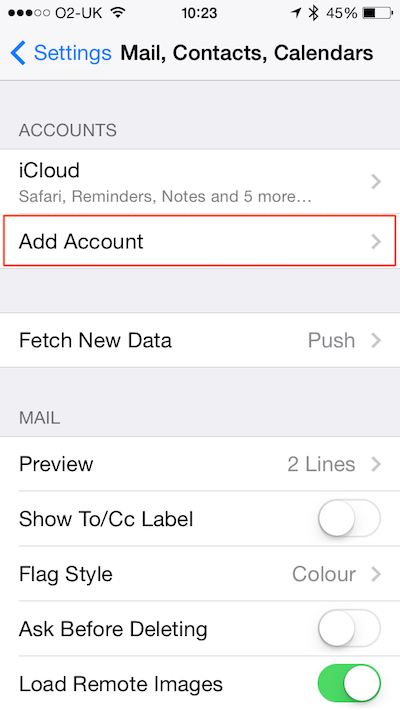
2. Now click Add Account…
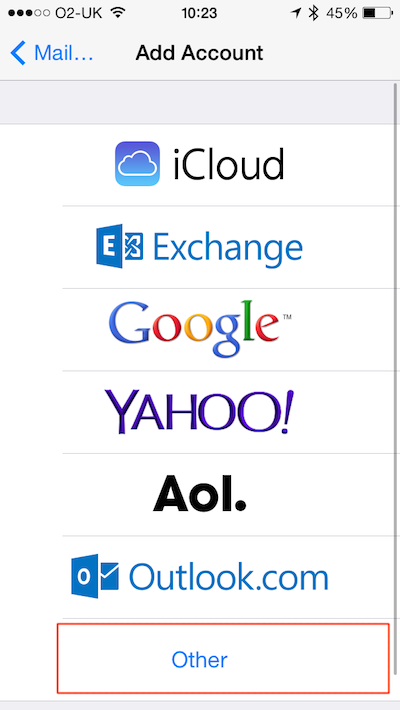
3. Select Other.
4. Now click Add Mail Account.
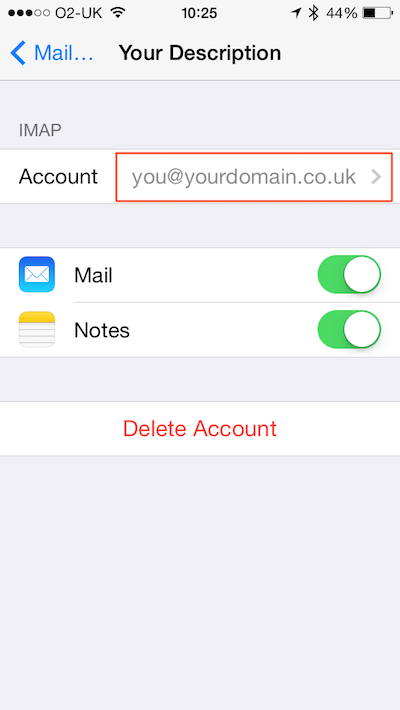
5. Fill in your Name, Email, Password and a Description for the account and click Next.
6. Now choose IMAP or POP and fill in the Incoming and Outgoing mail server properties and click Next.
7. An SSL warning will pop up, click Yes to continue. Then click 'Save'.
8. Now the account is set up you need to go back into the settings to make some final changes. Click on the account we just created.
9. Now click on the account.
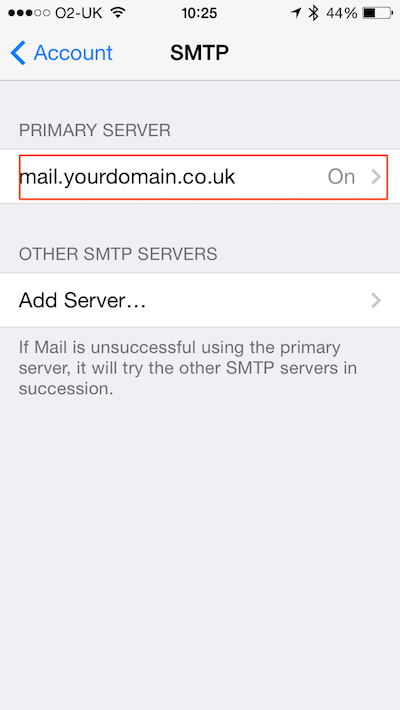
10. Now click on the Outgoing Mail Server SMTP.

11. And then click on the Primary Mail Server.
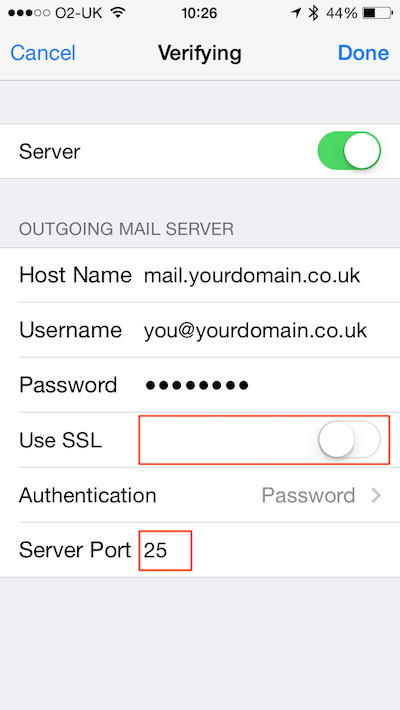
12. On the SMTP settings screen you need to set the following: Use SSL off and Authentication to Password then hit Done.
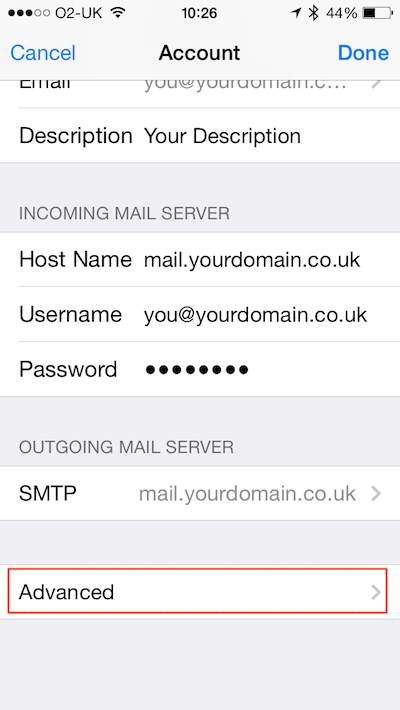
13. Now go back to Account.
14. Click Advanced.
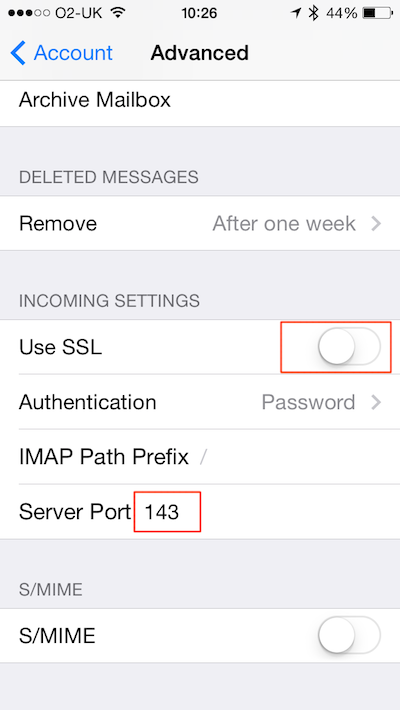
15. And set Use SSL off and Authentication to Password under Incoming Settings then go back to Account and hit Done.
That’s it! Your email is now set up on your iOS device ready to use.
Note: Your server with Nimbus is capable of being used as a basic mail server, but the ongoing battle between spam management, hacking and blacklisting means that Office 365 and Google Apps are the go-to platforms if email is critical to your business/site. Read more here.