Getting you Started with your First Website on our Platform
Yesss, you bought a new server! Welcome to Nimbus, good to have you on board. We've put together this all in one, quick start guide, to setting up your first website. Let's dig in....
So you want to set up your first site.
1. Log in
2. Click on the server you’d like to use
3. On your dashboard, find the ‘Websites’ panel
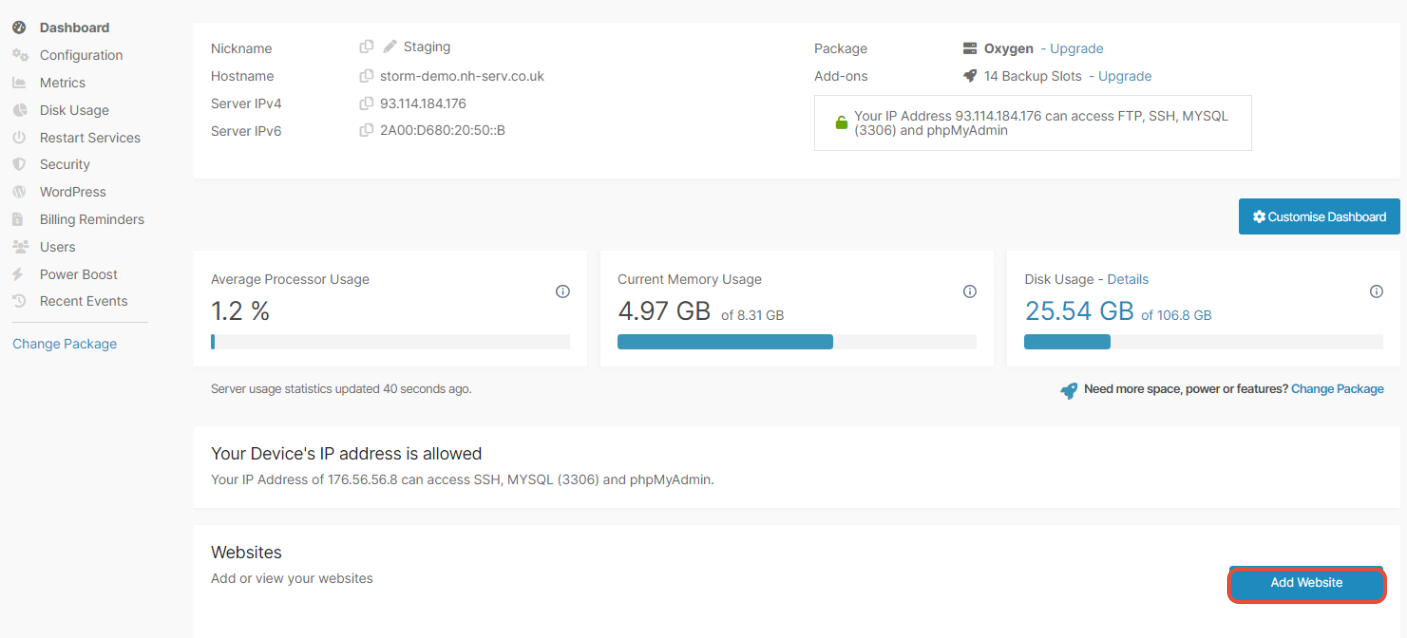
4. Click on the ‘Add website’ button
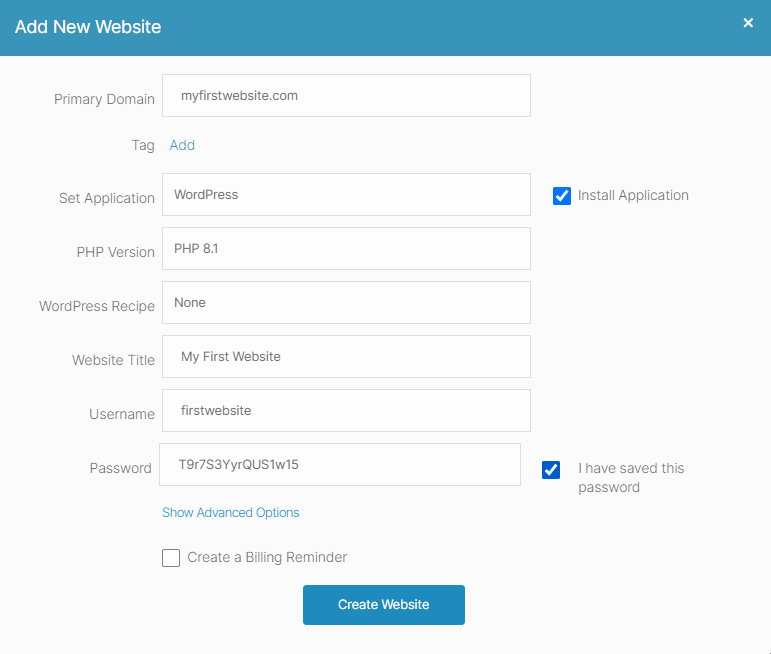
5. Type your domain name into the domain box
6. If you like, add a tag next to your site
Tags help you organise your sites - by customer, CMS, package type etc. If you give your site
a tag, you’ll be able to search for it using that tag later.
7. Use the drop-down menu to choose the application you’d like to install
If you’re migrating an existing site over, just choose it’s application but untick the ‘Install
application’ box.
8. Now choose the PHP you’d like to use from the drop-down menu. If you’re not sure which
to use, we always recommend going with the newest version
9. Click the ‘Create website’ button and you’re done!
Your new website’s all set up on your server. If you’re migrating an existing site, you’re now
ready to upload your files and database to the server too.
Now that your website’s set up on your new server, we recommend that you use our Preview URL feature to test your site before making any DNS changes. Here’s how:
1. Log in
2. Click on the server you’ll be using
3. Click on the website you’ll be testing
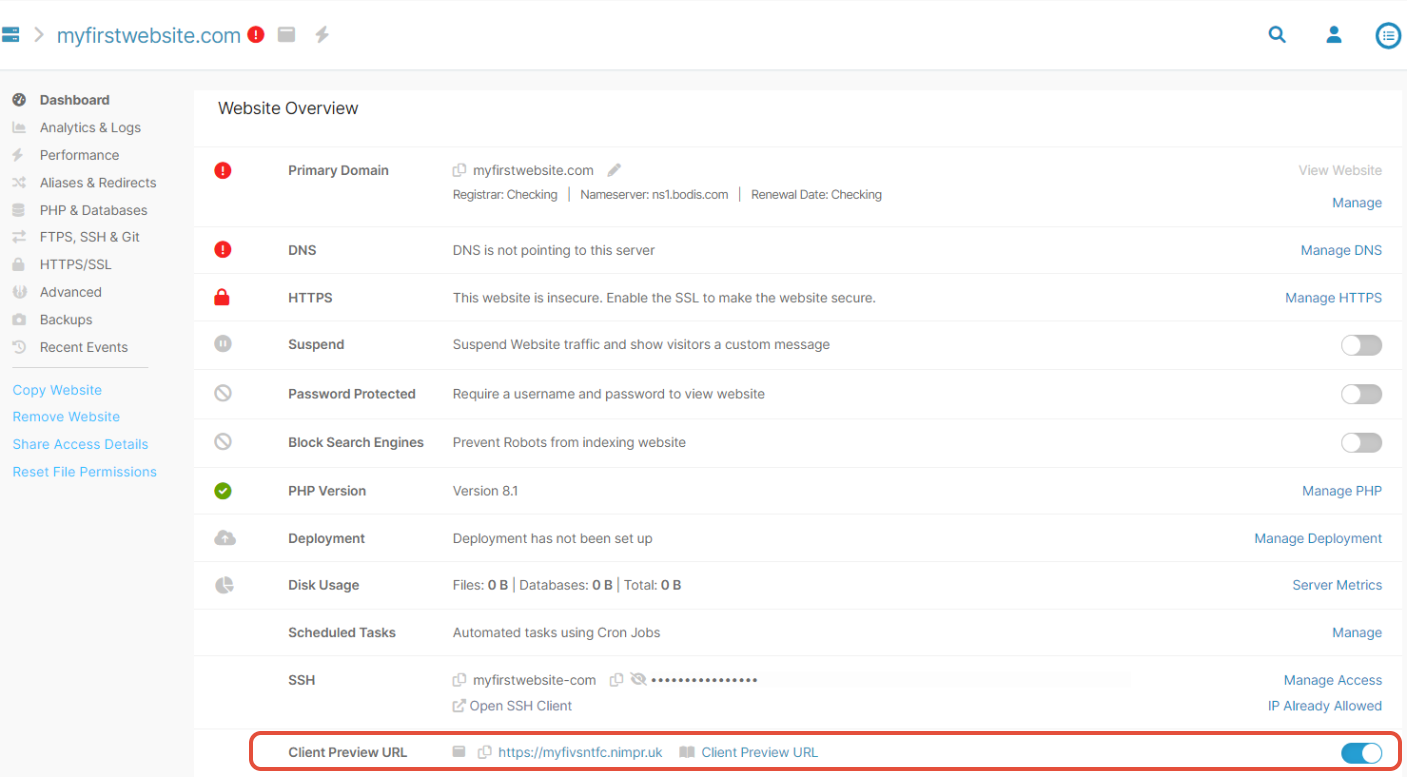
4. On the website's dashboard, you’ll find a feature called ‘Client preview URL’
5. Flick the toggle on and wait a few seconds for the changes to be processed
6. You’ll then see a temporary URL, which you can copy into a search bar to access and check
your website
7. Once your happy, flick the toggle off again
Your new site is all ready to go, what next? For us to host your domain within our platform, you’ll need to update the A records in the DNS zone for the site so they points to your Nimbus server. Please bear in mind that the DNS zone may not be with us, you can find out by logging in to your account with the Registrar for the domain and look at the listed nameservers. If it's nimbushosting.co.uk then brill, you can edit the DNS in the platform. If it isn't then you need to log in to the account that relates to those nameservers.
We don't like to brag or anything, but the platform is pretty clever when you add a new domain on your server. It goes off and looks to see if you already have a DNS zone on our nameservers, if there's one there then it doesn't do anything, if there isn't then it will create a default zone for you. Nifty, eh? You may need to change that zone (for example if the site is using an external mail provider you'll need to update the MX records), so we always suggest checking the zone it's created for you.
You can do it like this:
1. Log in
2. Click on ‘Domains’ on the left-hand side menu
3. Look through the list and find the one you're looking for and click Edit.

4. You'll see the full DNS zone with the A records already pointing at the server you set the site up on.
5. Check the MX records and if you need to add any subdomains or make any other changes and save the changes as you go
6. Finally, if you’re moving over the DNS zone from a previous company to Nimbus you’ll need to
tell them our nameservers which are:
Moving your domains over to us, will allow you to control the DNS directly through our platform.
Please note it can take up to 48hrs for a nameserver change to propagate.
ns1.nimbushosting.co.uk | ns2.nimbushosting.co.uk | ns3.nimbushosting.co.uk
Website built, DNS updated.... it's time to add an SSL, you definitely need an SSL on there. The platform can install a Let's Encrypt certificate on there for you for free as long as the site is live on that server (ie the DNS is pointing to it and has fully propagated). All you need to do it toggle it on, here's how:
1. Log in
2. Click on the server you’ll be using
3. Click on the website you’d like to add the SSL to 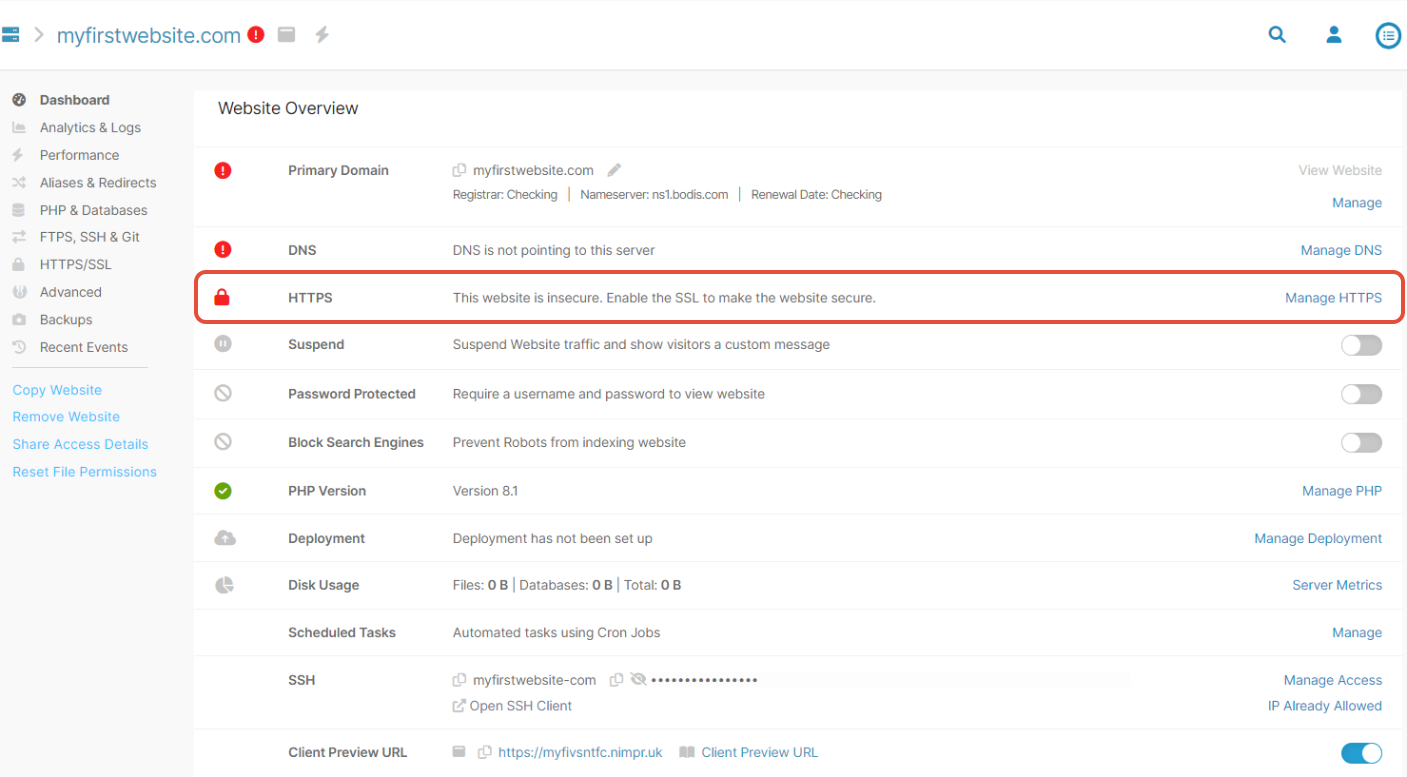
4. Click ‘Manage HTTPS’ on the dashboard
 5. In the Let's Encrypt SSL section flick the toggle on and you’re all done (if you're seeing the above message you need to wait for the DNS to propagate)
6. You can pay to upgrade your SSL at any point. Just head to the top of the page called
‘Need an SSL certificate right away?’
7. Simply choose the certificate you’d like, enter your card details and click ‘Buy now’. Done!
Get your account set up just the way you want it, by letting us know what you’d like notifications about - from server and website alerts to the platform’s latest updates. Just follow these steps:
1. Log in
2. Click on ‘Account’ on the left-hand side menu
3. Click on ‘Notifications’
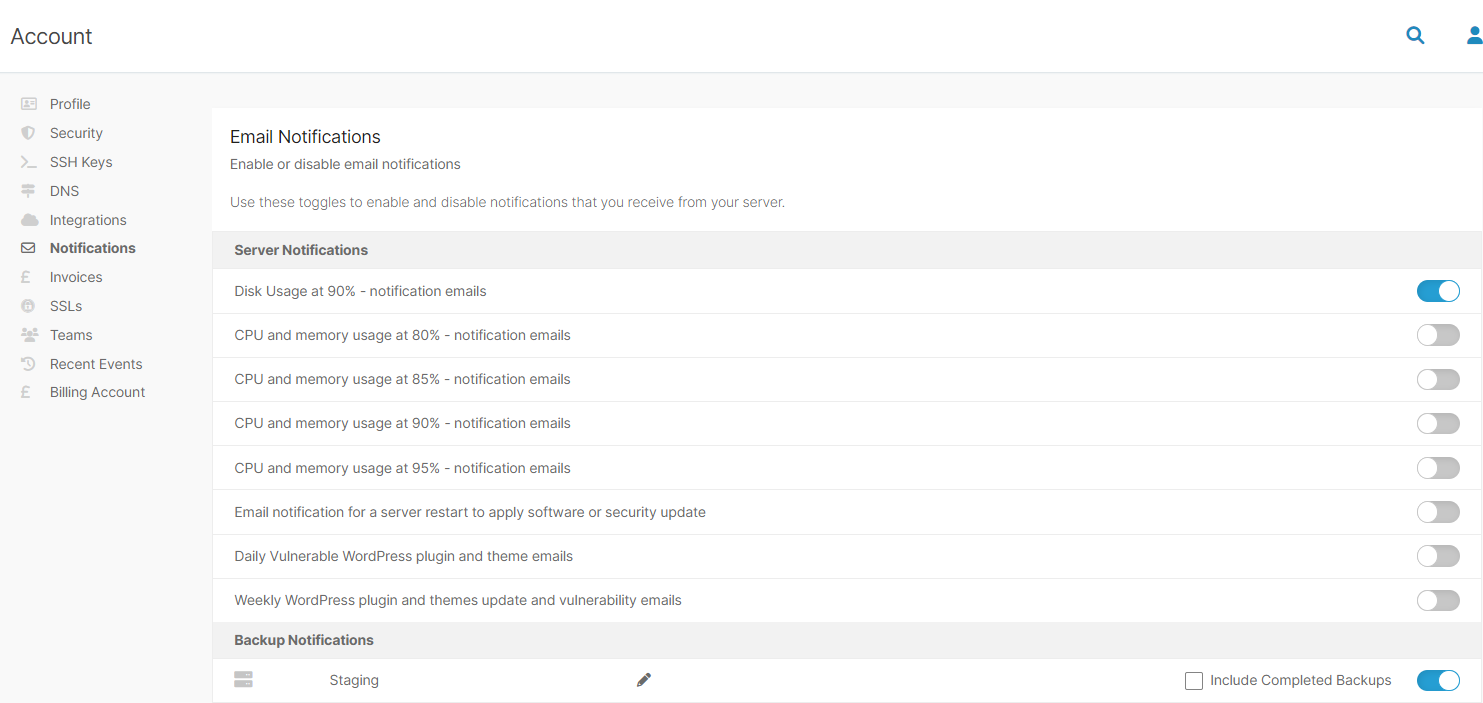
4. You’ll see a list of all of the different notifications we can send you
5. Go through the list and flick the toggles on if you’d like to receive those notifications, or off
if you’d rather not. Simple!
We’ve made it really easy to work with other people on your web projects, whether they’re in your studio, working remotely or part of your client team. You can invite people on an individual basis or to make life easier, add whole teams. Here’s how:
1. Log in
2. Click on ‘Account’ on the left-hand side menu
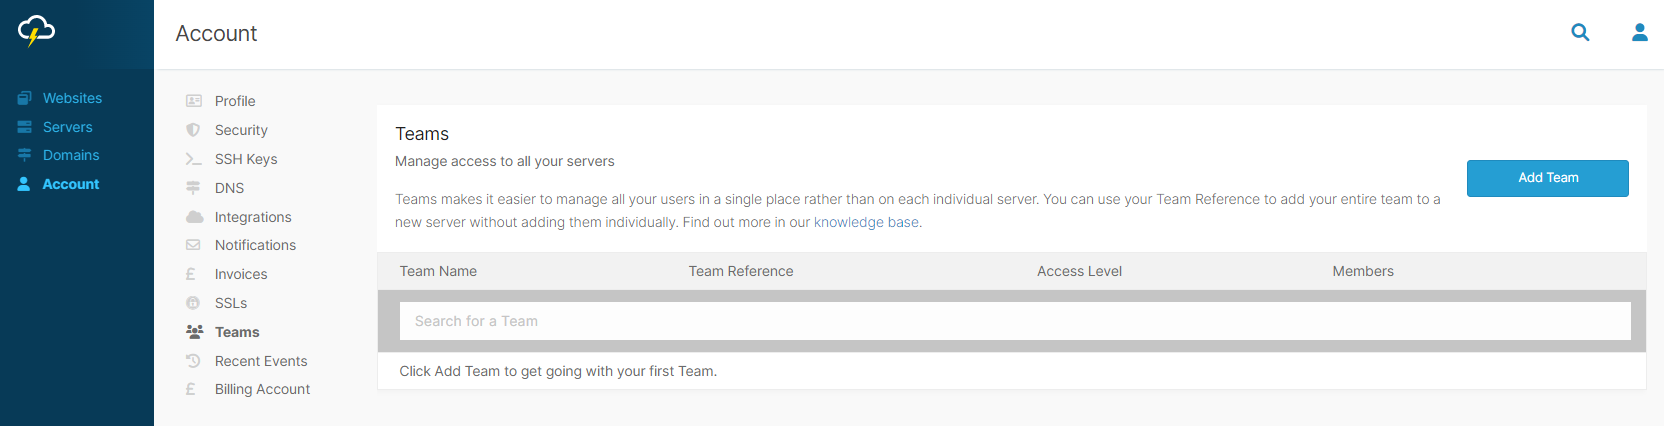
3. Click on ‘Teams’ followed by the ‘Add team’ button
4. Give your team a name and click ‘Create team’
5. To manage your team and add members, click the ‘Manage’ cog next to the team name
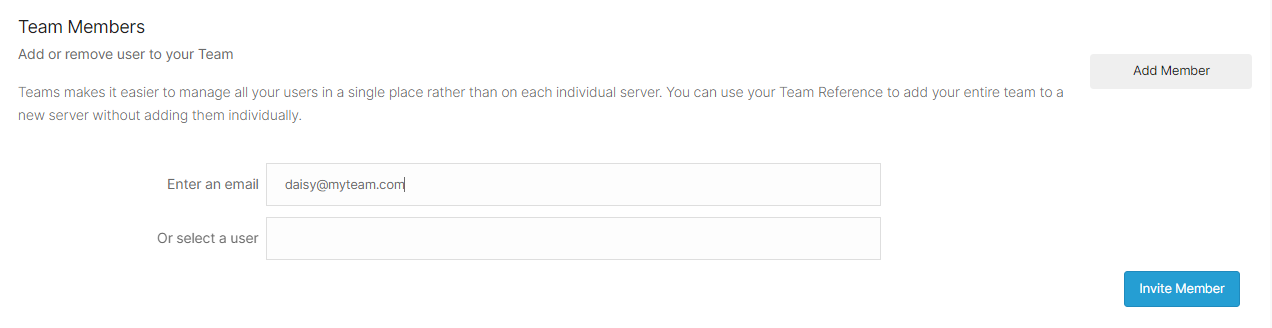
6. To add users to your team, click the ‘Add member’ button, type in each user’s email address
and click ‘Invite member’
Once you’ve added all the users to your team, you’re ready to give them access to your servers. You’ll need to be a server owner to do this, but to help you delegate work, you can make anyone who has access to your server into an owner too - or we can do it for you. Here’s how server owners can give teams access:
1. Log in
2. Click on the server you’d like to give the team access to
3. Click on ‘Teams’ in the left-hand side menu
4. Click ‘Add Team’
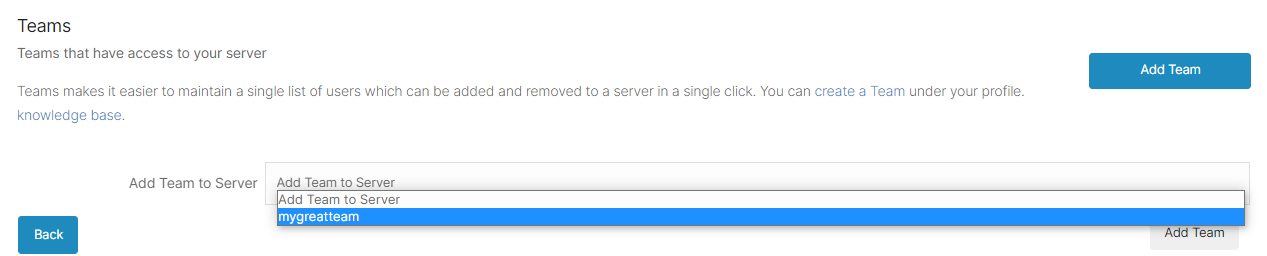
5. Select 'One of my teams'
6. Click on the team name
7. Click ‘Add team’
8. That’s it. All the users in that team will now have access to your server and see it in their
multi-server dashboard
Your server’s all set up and ready to go. But that’s just the beginning! We’ve packed our platform with a whole load of smart, intuitive features you’ll love, all designed to save your agency time and give your sites superpowers. You can find out more about each feature – and how to get it set up – right here in our knowledge base. It’s full of helpful articles and handy step-by-step guides. You can also access the knowledge base anytime, straight from your server using the ‘Support’ button on the left-hand side menu or via our website homepage.