How To: Adding a Custom/Primary Domain to Your Website
There are two ways to add a custom domain to your website:
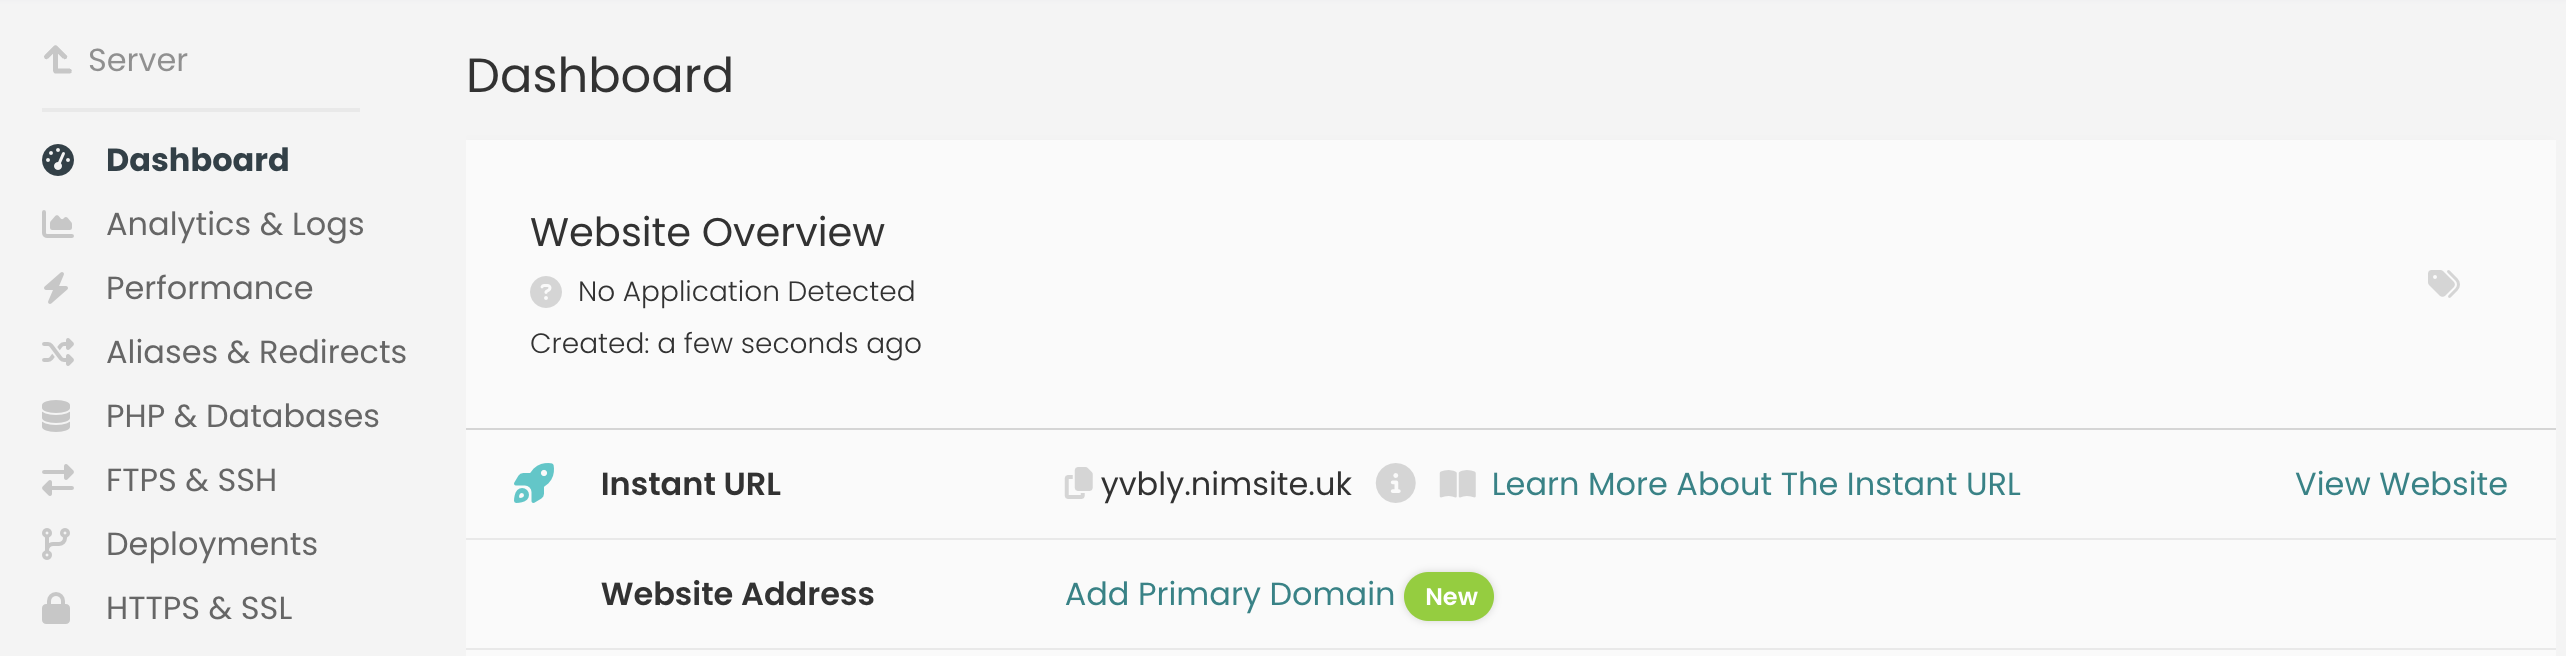
Option 1: Using the Add Primary Domain Tool
- Go to your Website Overview.

- Click 'Add Primary Domain'

- In the modal window that appears, enter your custom domain.
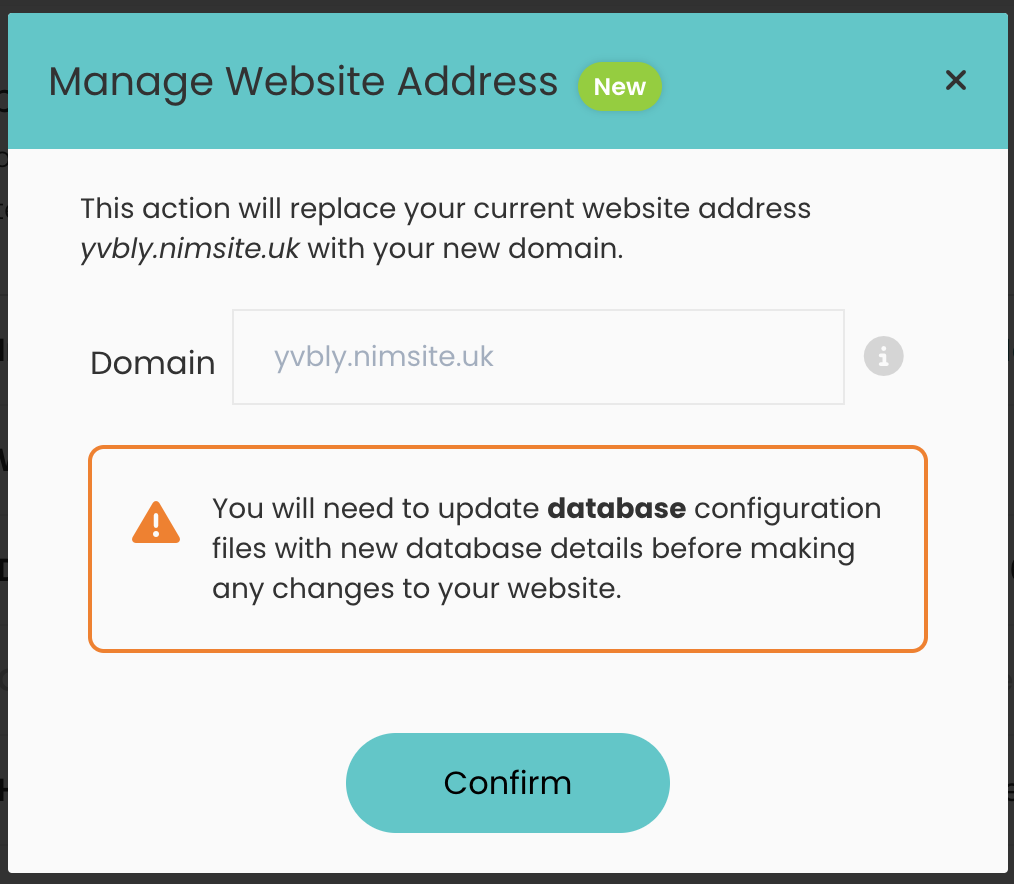
- Click "Confirm" to save the changes.
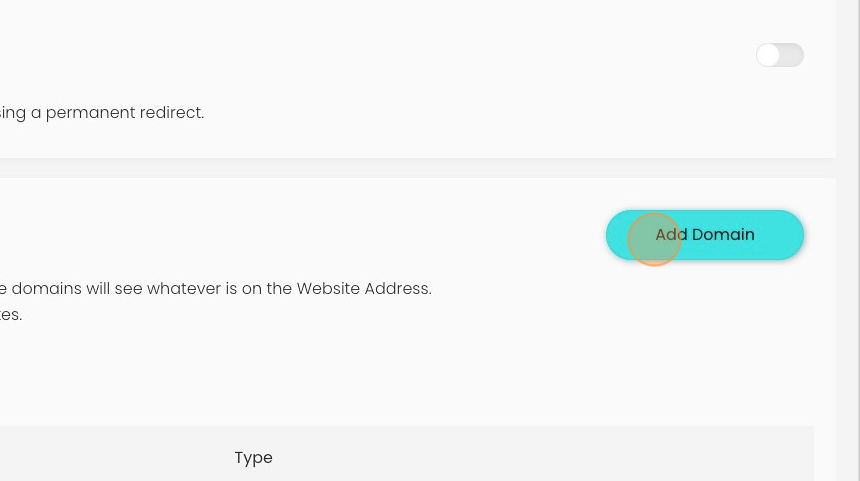
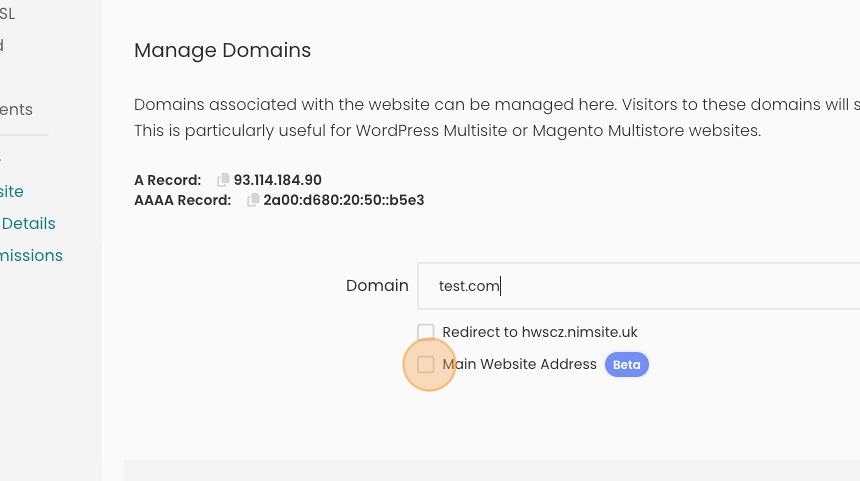
Option 2: Using the Aliases & Redirects Menu
- Navigate to your Website Overview.
- Look for a section called "Aliases & Redirects".

- Click on "Add Domain".
- Enter your custom domain name in the designated field.
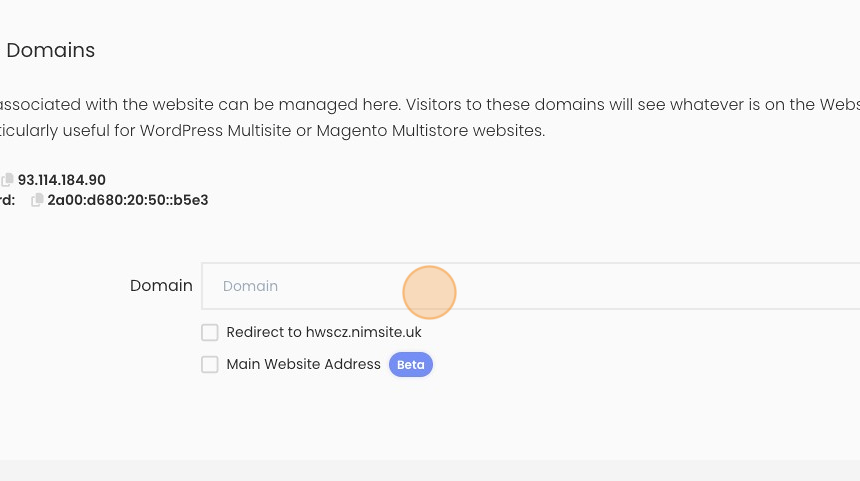
- Click "Main Website Address" to make your custom domain the primary domain for the site
Important Notes:
DB Configuration:
For WordPress Websites:
- When you add your custom domain, we'll automatically update the website URLs for your database, ensuring that all internal links and references point to your new domain.
For Other Website Frameworks:
- You will need to update website URLs manually within your framework's configuration.
DNS Setup
You must configure your Domain Name System (DNS) settings. This step connects your domain name to your website's hosting server.
Once you've completed these steps and configured your DNS, your website will be accessible using your chosen custom domain. There's no need to copy or move website files – everything will be seamlessly linked.
Looking for something else?
Check out these useful links to our website and other carefully curated resources: