How To: Manage DNS
If you are using Nimbus to manage the DNS for your domain name then you can edit your domain's DNS records from within the Nimbus platform.
The Types of DNS Records you can add or change are:
A - Most common record, used to map hostnames to an IP address of the hosting server. The destination must be an IPv4 address.
AAAA - Same as an A record but for a 128-bit IPv6 address. The destination must be an IPv6 address.
MX - Maps a domain name to a list of mail servers for that domain. The destination must be a hostname.
TXT - This is a text-based record, typically used for verification records, SPF records and DKIM records.
CNAME - Alias of one name to another: the DNS lookup will continue by retrying the lookup with the new name. The destination must be a hostname.
SRV - Generalised service location record, used for newer protocols instead of creating protocol-specific records such as MX. This type of record is typically required for MS Exchange/Office 365.
Steps
1. As always, let's start by logging onto the platform.
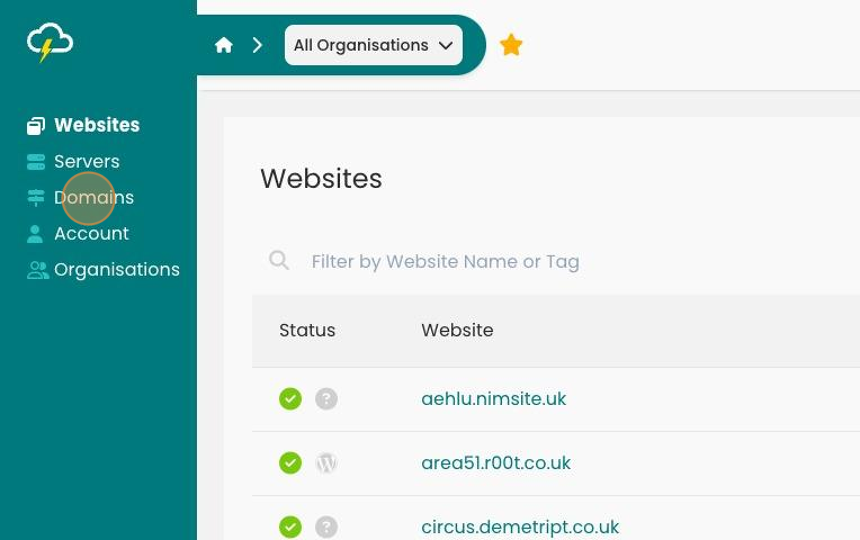
2. After you'll be redirected to this screen.
Click "Domains" to be directed towards your DNS settings.
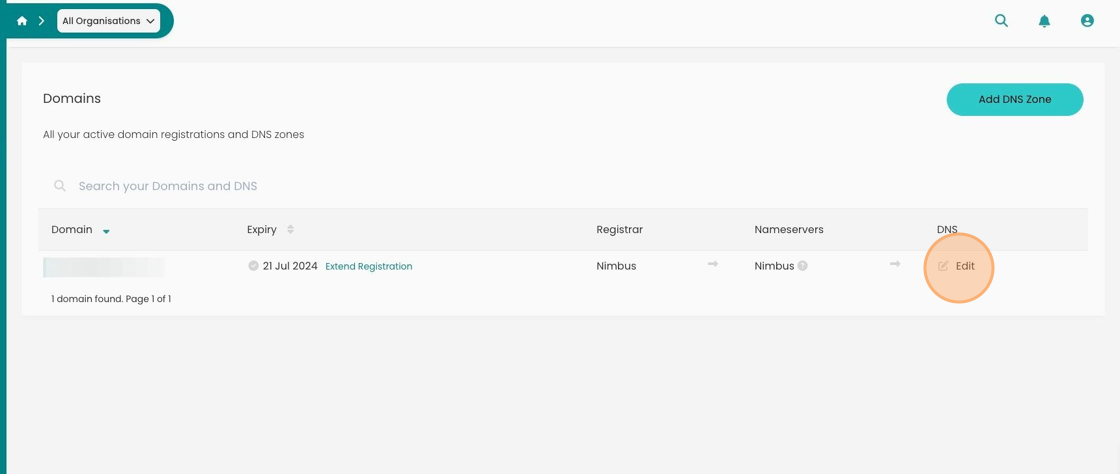
3. On your Domains screen, go and click the "Edit" button below the DNS
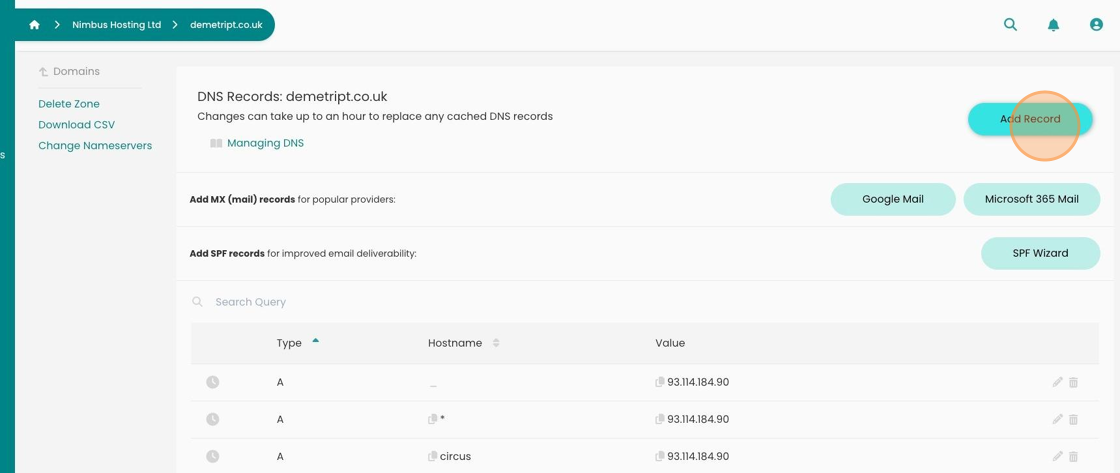
4. Here you have the choice to add a record by clicking the "Add Record" button.
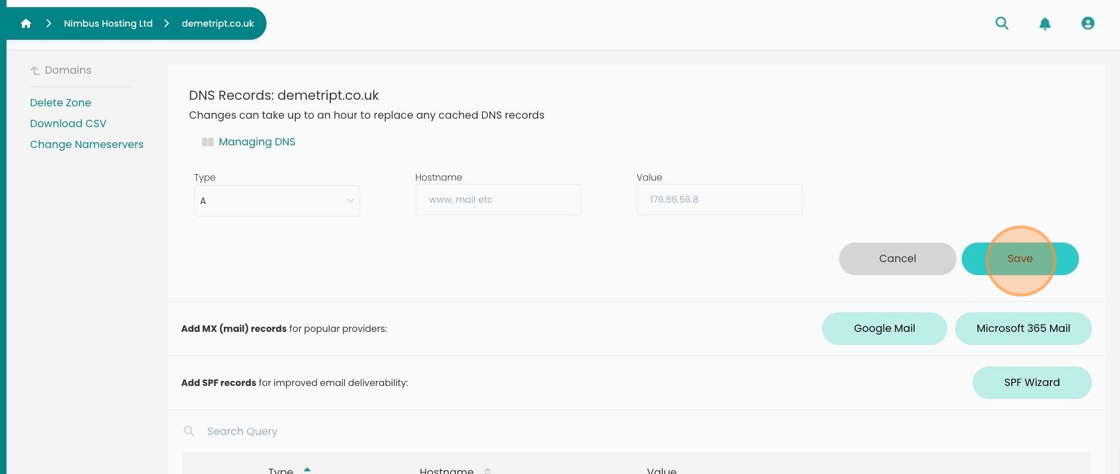
5. You have the choice here of adding various types of records:
A, AAAA, MX, TXT, CNAME, SRV.
You then add your Hostname and end with the Value.
When you're happy, click "Save".
6. You are also given the choice of setting up your MX records with Google Mail or Microsoft 365 Mail
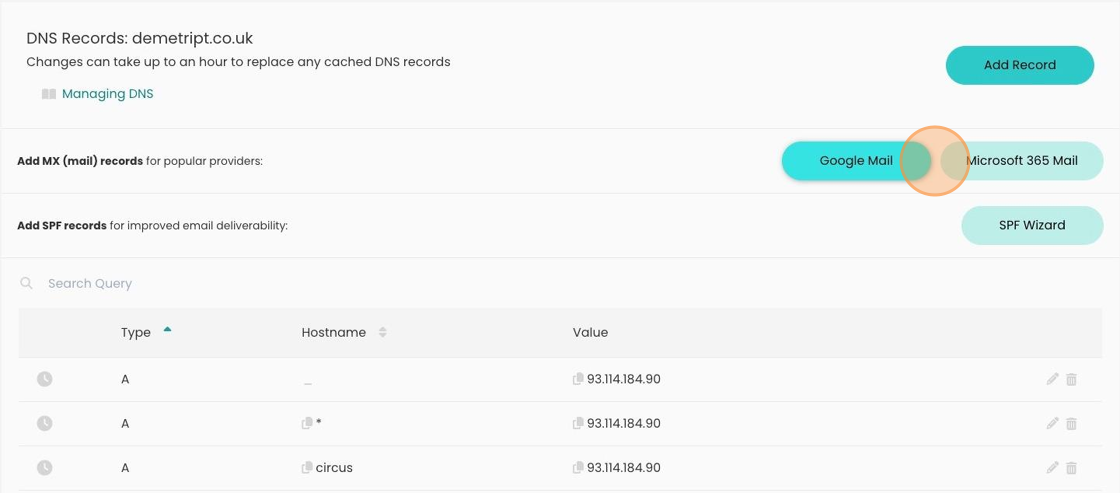
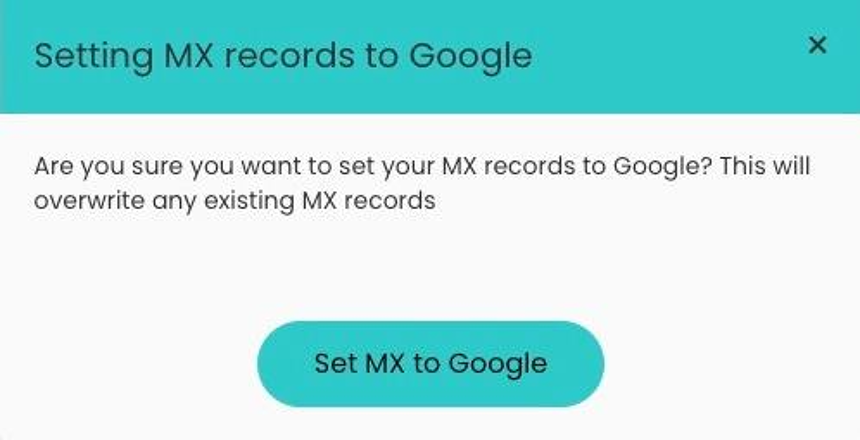
7. Whether you click Google or Microsoft 365 you will be shown this screen.
If you click the button, it will populate the zone with the Google or Microsoft default MX Records.
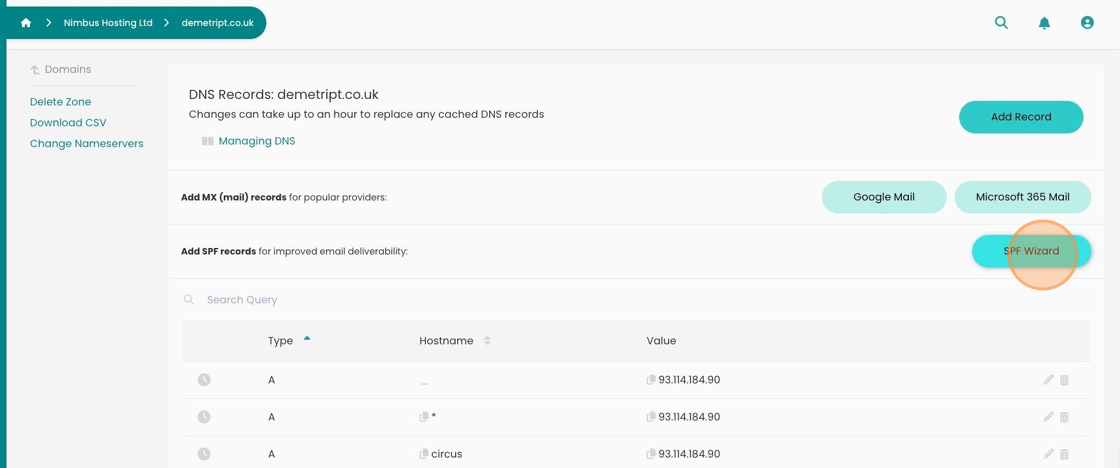
8. You can also set up your SPF (Sender Policy Framework) with a wizard.
Click "SPF Wizard" to start
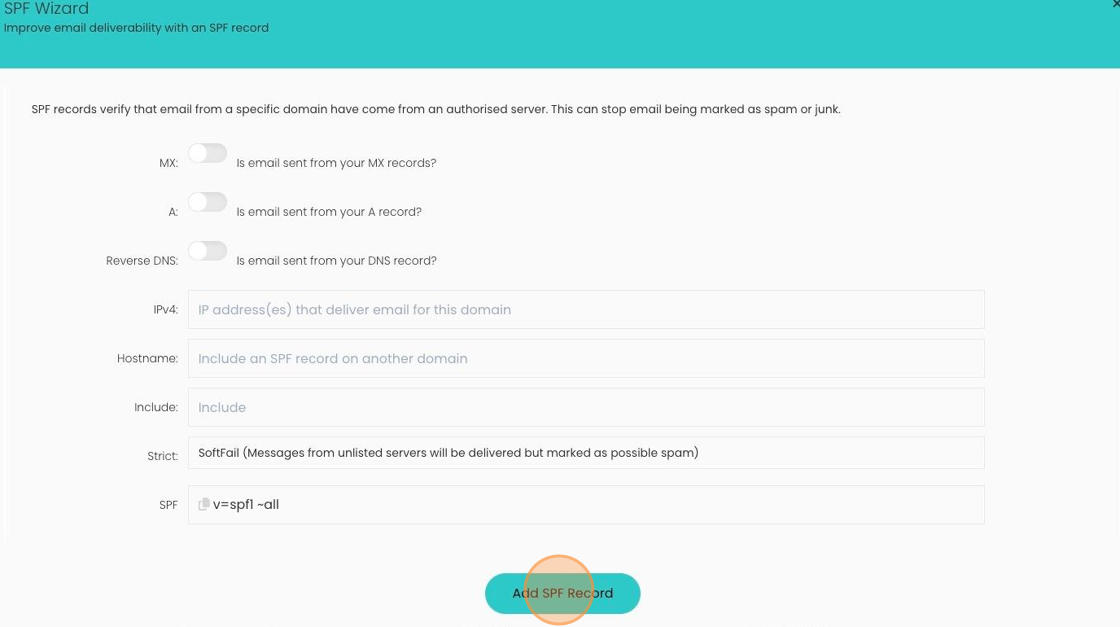
9. In this screen you will be able to set up your SPF record.
When you are happy with your choices, click "Add SPF Record"
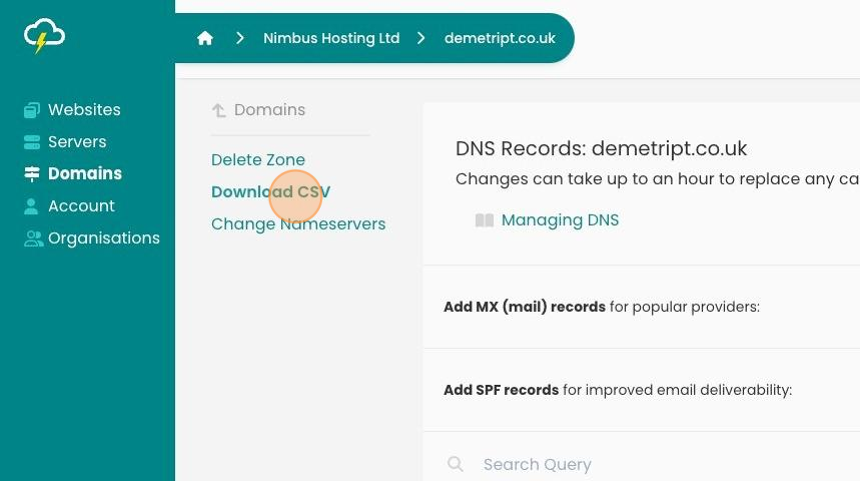
10. If you wish to download your DNS Records in an easy CSV format.
Click "Download CSV" and you will be prompted whether you wish to download the file or not.
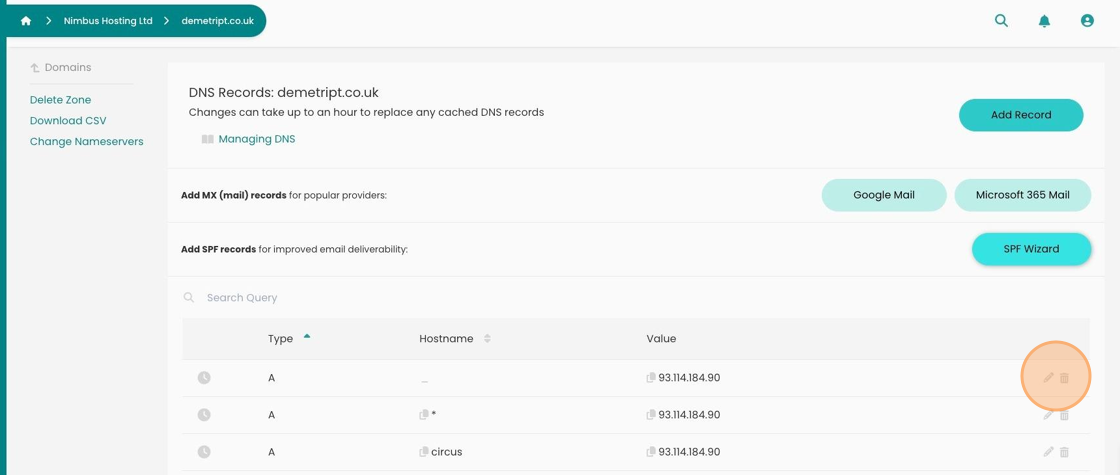
11. You have the choice of editing any record or deleting any of your choosing by clicking the icons on the left
12. If you need to change the Nameserver, make sure to make the changes in the "Change Nameservers" section.

Looking for something else?
Check out these useful links to our website and other carefully curated resources:
Industry-leading insight reports
Updated 7 months ago
