Using the SMTP Relay Feature with SendGrid
The SMTP feature in our platform is designed to work with a number of different SMTP providers, one of which is SendGrid.
If you're unsure what SMTP is, or why we've added a specific SMTP Relay feature within the platform, you can learn more on on our blog:
- What is SMTP relay and why is it so important?
- Why it's smarter to host your emails and website separately
This guide will take you through the steps needed to generate your SMTP credentials and to verify your domains so that you can start using SendGrid to relay your site's outgoing email.
To get started you'll need to create a free SendGrid account using the link below:
Generating your SMTP Credentials
1. From the SendGrid dashboard click on Settings, followed by API Keys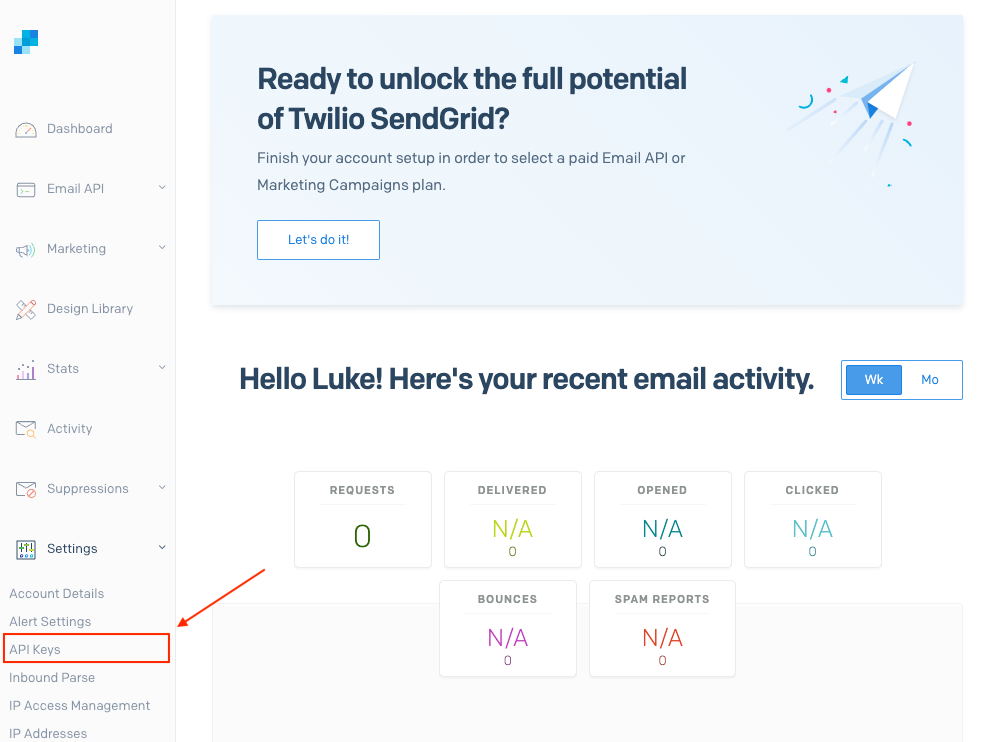
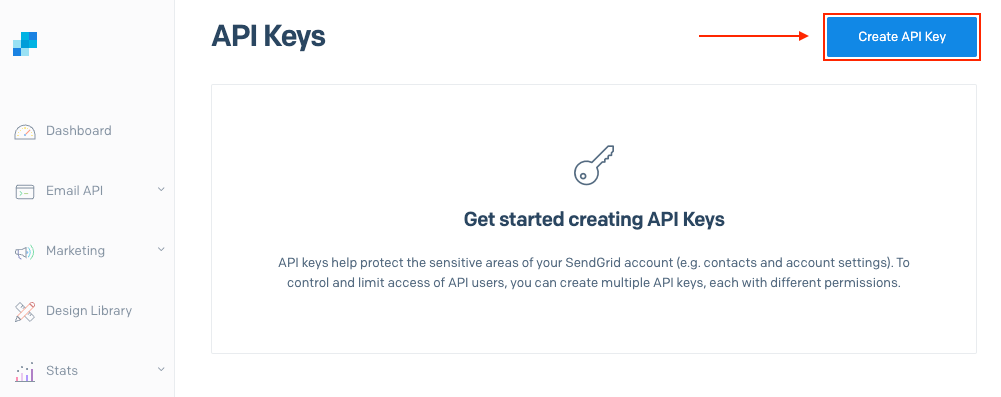
2. Then click Create API Key
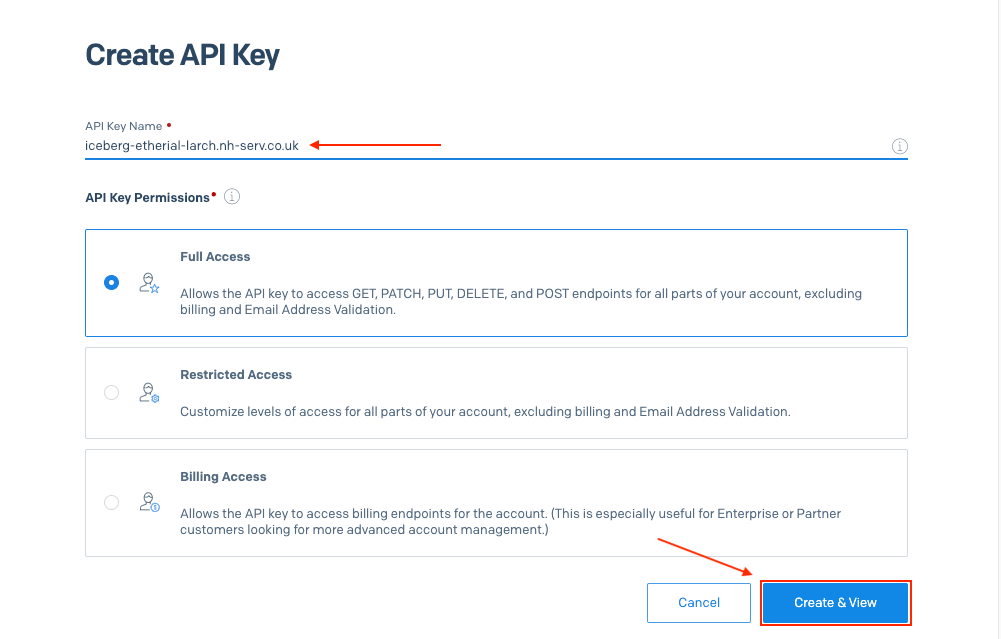
3. Enter a name for your API Key
(You'll see in the example below that we have used the hostname of the server)
4. Under the heading of 'API Key Permissions', select Full Access
5. And then click Create & View
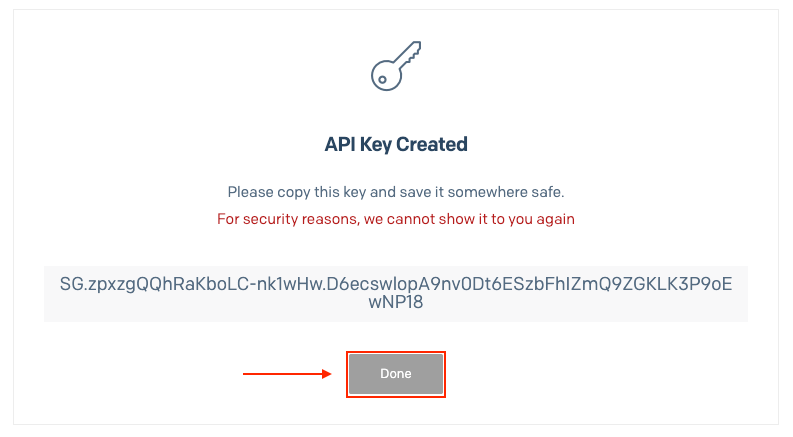
6. Make a note of the API key that is shown
Important: Your API Key is only shown once so you must take a copy of this now
7. Once you have made a note of the API key, click Done
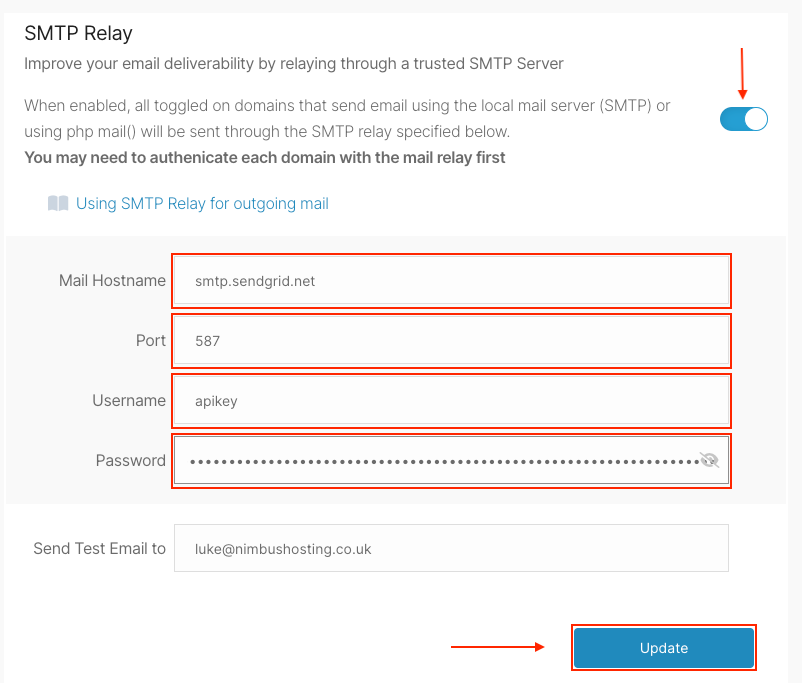
The SendGrid API Key is your SMTP password. The other details you will need can be found below:
Mail Hostname: smtp.sendgrid.net
Port: 587
User: apikey
Password: Your API Key
Now that you have generated your SMTP credentials, you're ready to add these to the SMTP feature within the Nimbus platform.
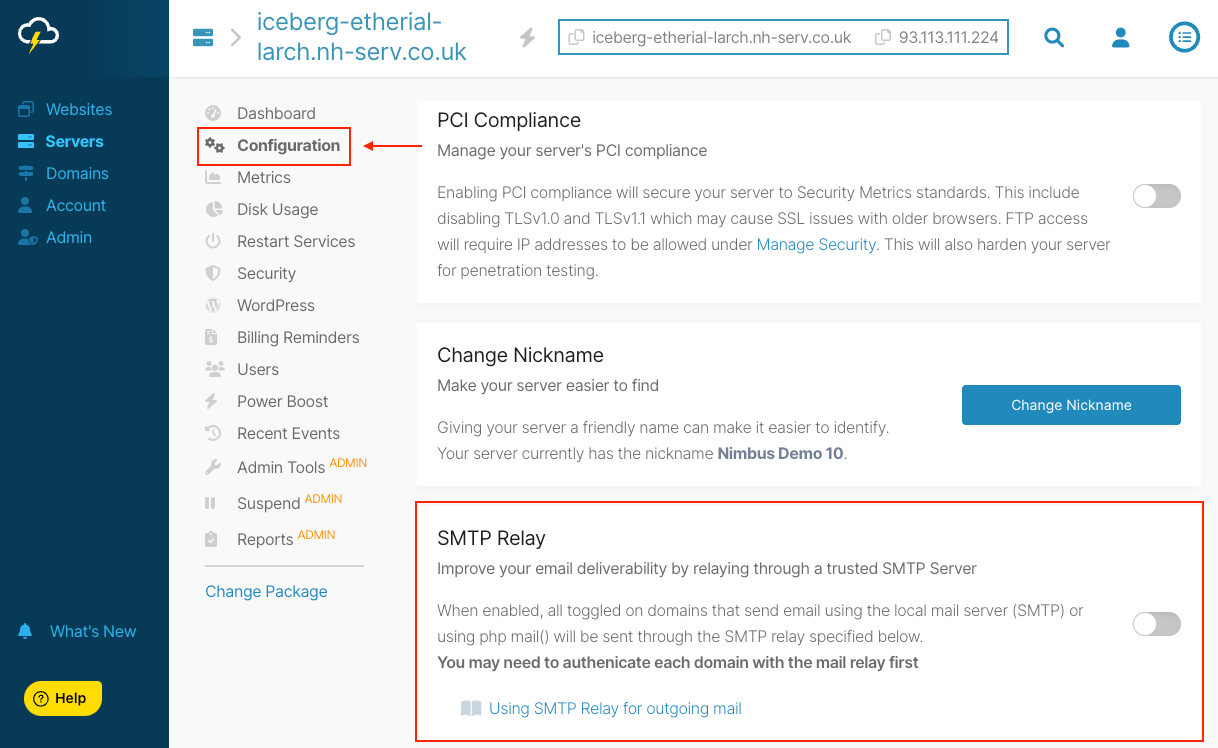
Enabling SMTP Relay in the Nimbus Platform
8. Firstly, log into https://app.nimbushosting.co.uk/servers
9. You can find the SMTP Relay feature under the Server Dashboard, and then by clicking Configuration in the left hand menu
10. Toggle on the SMTP Relay feature and enter the Mail Hostname, Port, User & Password that you generated earlier in the guide
(Remember your SendGrid API key is your SMTP password - you can see an example of these details entered below)
11. Now click Update to save the settings
12. Leave this open for now, as before we can start sending any email through SendGrid we first need to verify the domains. We'll head back here later.
Verifying your Domain
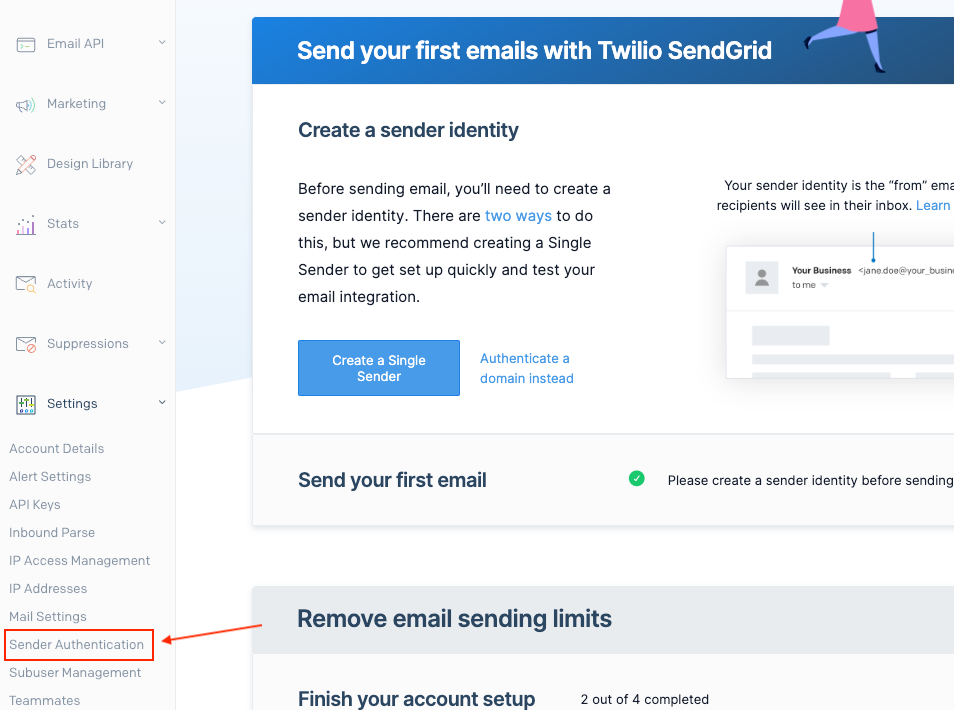
13. Head back over to the SendGrid dashboard and click on Settings, followed by Sender Authentication
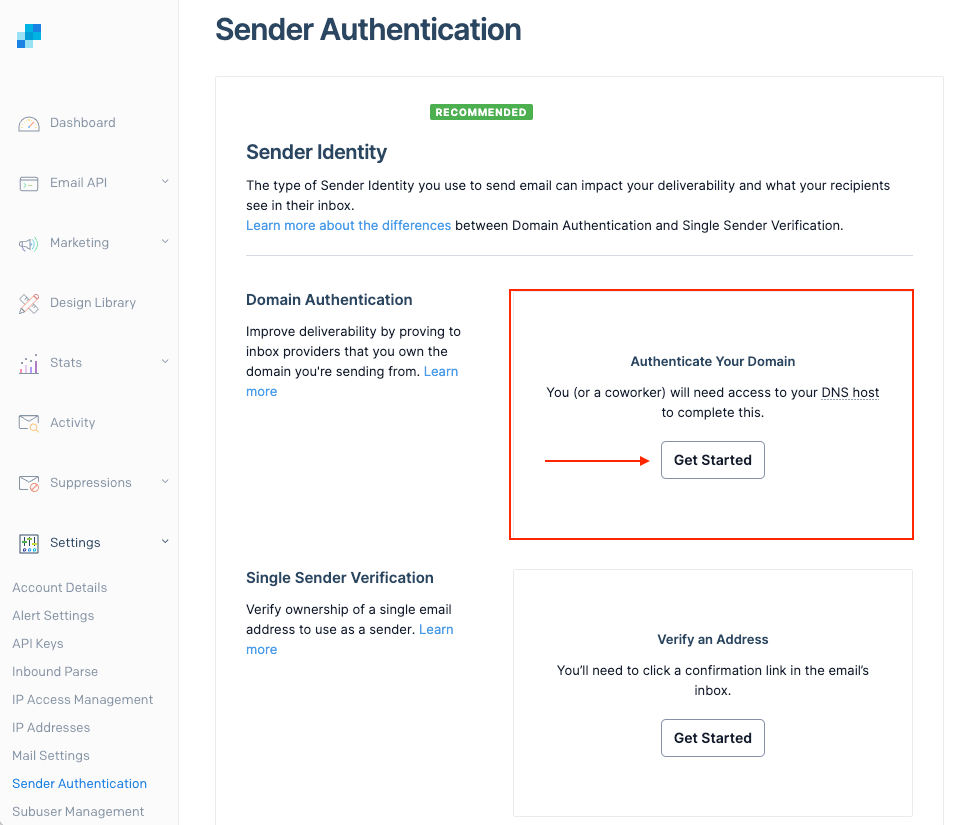
14. Under Authenticate Your Domain click on the Get Started button
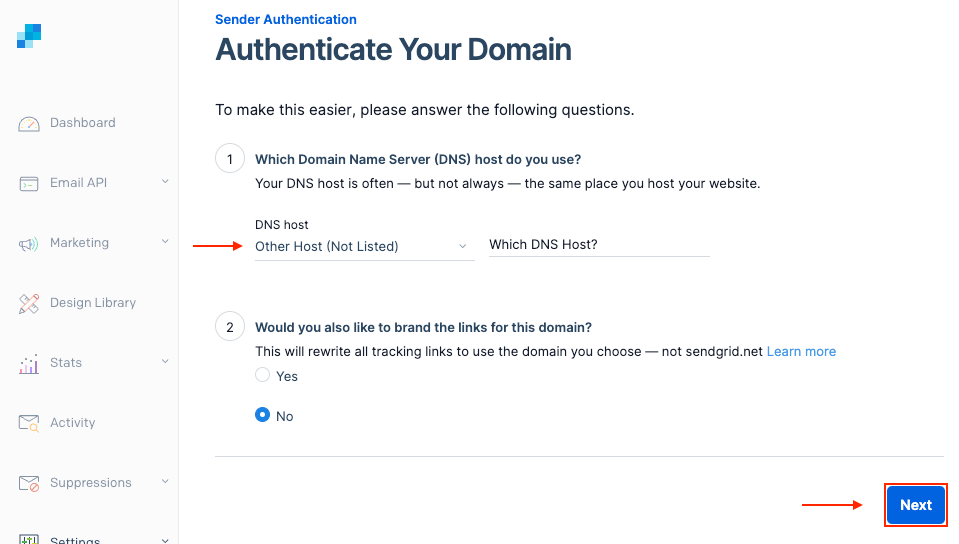
15. Select Other Host as your DNS host, then click Next
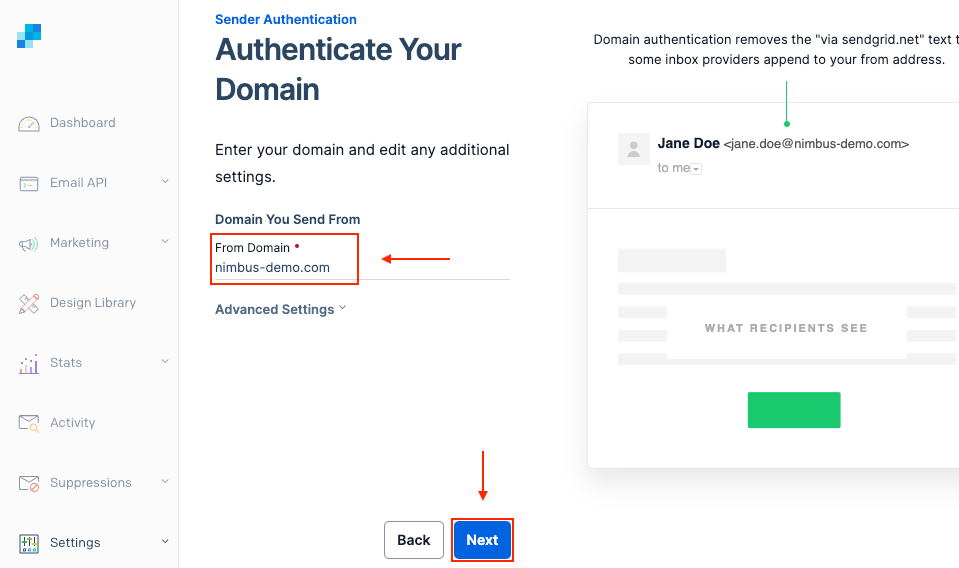
16. Enter the domain you would like to relay email from, then click Next
(You can add more domains for your other websites later)
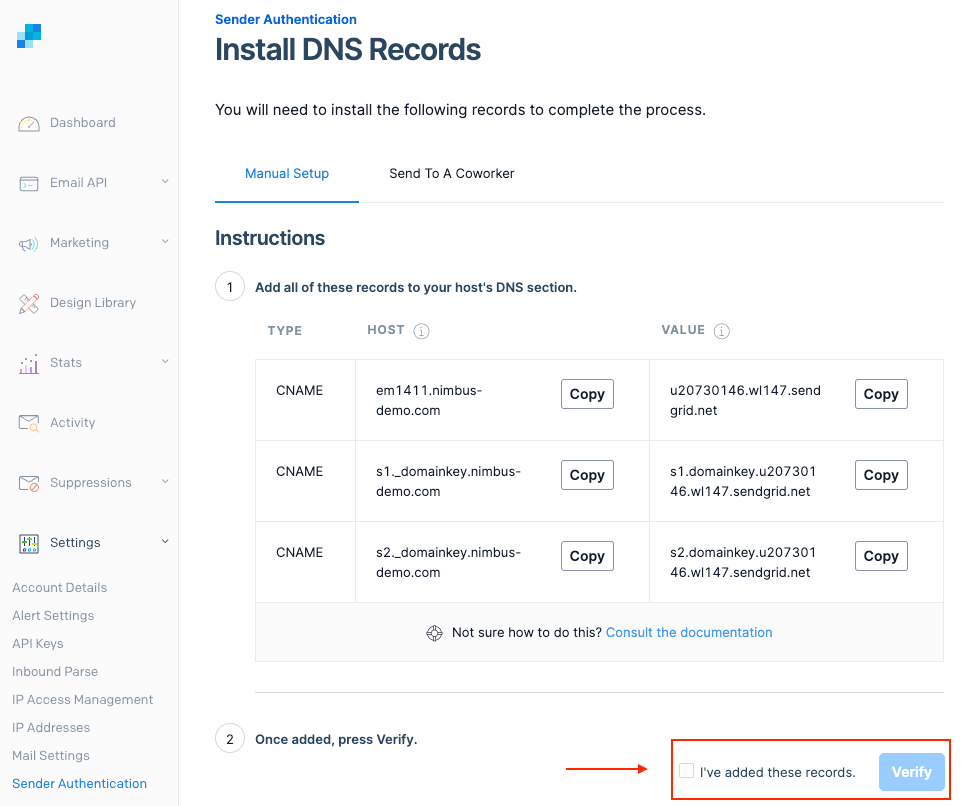
17. You will now be presented with a list of DNS records that you will need to add to your domain's DNS.
Add the records, and then check the I've added these records check box and click Verify
18. If SendGrid has picked up the records, once you click verify you should see the below screen.
(Please note that new DNS records can take up to an hour to propagate so SendGrid may not pick these up straight away.)

19. Repeat the Verifying your Domain steps for any other domains you would like to relay through SendGrid
Once you have verified all your domains, you can then toggle these on for relay within the Nimbus platform.
Testing the SMTP Relay
20. Head back to the SMTP Relay feature in the platform
21. At the bottom of the SMTP Relay pane you'll see a list of sites that you have set up on your server with toggle switches beside them
22. Toggle on any of the domains you have verified with SendGrid
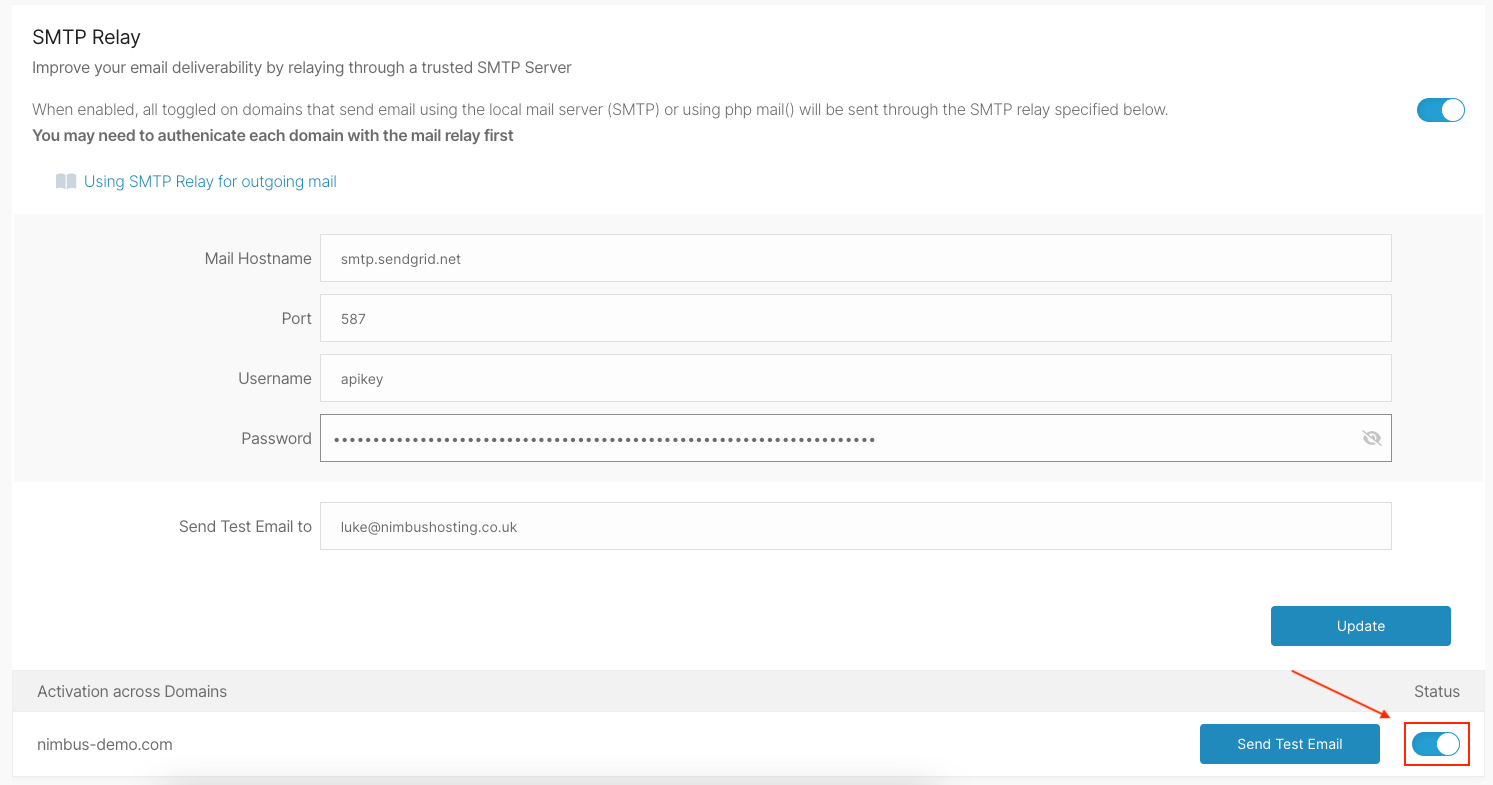
23. Click the Send Test Email button to send a test email

24. If everything has worked, you should receive an email that has been sent via SendGrid
That's it. You've successful relayed your site's email via SendGrid using SMTP relay – which means more reliable emails, more customers reached, and more crises averted.